Cheap OBI-Wifi-Socket as alternative to Sonoff S20
Posted on March 23, 2018 (Last modified on November 27, 2021 )
3 minutes • 470 words • Other languages: Deutsch
Table of contents
In c’t 02/2018 I found an article Artikel about the cheap wifi-socket with the programmable ESP8266 - the Sonoff S20. After reading the article, I ordered a S20 and programmed it. I was very satisfied.
Now I found a similar wifi socket at OBI market for less than 10 €. On the Internet you will find relatively little about the device, why I collect my experiences here.
Note: The wifi-socket should not be connected to a socket, when you tink on it. There is danger to life!
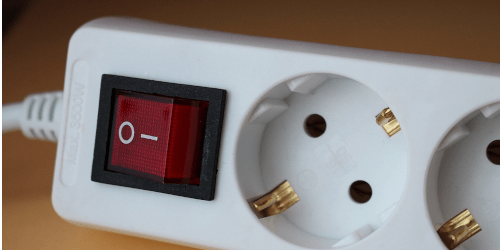
Hardware
The case is screwed with only two security screws.

In my toolbox there was an almost fitting screwdriver to remove the screws. After removing, the case can be opened with gentle pressure left and right and a little jerky.


Now the pcb can be screwed off by a last single screw.

You now see ther vertical build in ESP8266. Its pins on the carrier board are labeled unexpectedly.

You can solder a female header to the pins. I decided a quick-’n’-dirty-variant. It consists of a double-rowed male header and a folded post-it, that keeps on the header.


Now you can connect a usual FTDI-adapter.
- VCC -> 3,3V (FTDI)
- RESET -> n.c.
- TXD -> RXD (FTDI)
- GND -> GND (FTDI)
- RXD -> TXD (FTDI)
- GPIO0 -> bridged to GND
- GND -> bridged to GPIO0
Software
I installed Atom and its plugin platform-io . Furthermore I downloaded the sources from last release of Tasmota-project . I unarchived the archive and opened the project in Atom.
In platformio.ini I uncommented the line “env_default = sonoff-DE”, to build only this version.

In sonoff/user_config.h I edited various default values, to save the basic configuration after reseting:
- language (MY_LANGUAGE)
- wifi-configuration (STA_SSID1 and STA_PASS1)
- mqtt-configuration (MQTT_HOST and MQTT_PORT)
- NTP-Server (NTP_SERVER*)
I disabled unneccessary services by commenting some attribute:
- Domoticz (USE_DOMOTICZ)
- HomeAssistant (USE_HOME_ASSISTANT)
- mDNS (USE_DISCOVERY)
Flashing
Connect the FTDI-adapter to your PC. Ensure to bridge GPIO0 and GND. After connecting remove the bridge.
Start flashing by pressing ALT+STRG+U.

If everything is fine there should be displayed a success message like this one:

Remove the FTDI-adapter and close the case.
Configure Tasmota
When the wifi-socket is plugged into a “real” socket, nothing happens. The button does not work and the on-off-state is more or less random.
The configuration needs to be done in the webinterface. Klicks to “Einstellungen” and “Gerät konfigurieren”. First set “Geräte Typ” to “18 Generic” and save it. Then set and save:

Configure openHAB 3.x
The installation and configuration of a mqtt-broker is not this article’s part. In openHAB the mqtt-binding must be installed and configured. Things and items can be created by UI or by classic text files:
// conf/things/mqtt.things
Thing topic obisocket "Obi-Steckdose" {
    Channels:
        Type switch : POWER "OBI-Steckdose" [ stateTopic="obisocket/stat/POWER", commandTopic="obisocket/cmnd/POWER" ]
}
// conf/items/myitems.items
Switch ObiSocketPower "OBI-Steckdose" <switch> { channel="mqtt:topic:<broker>:obisocket:POWER" }